
-
1.After you’ve filmed and edited your segment to 15 seconds, export it from your video editing program.
-
2.Open up Flash, and import your video to the stage. (File:Import:Import to Stage)
-
3.Name your first layer something obvious (like “video”)
-
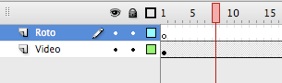
4.Add a second layer (Insert:Timeline:Layer - or click the layer icon).
-
5.Rename the second Layer “Roto” or something like that.
-
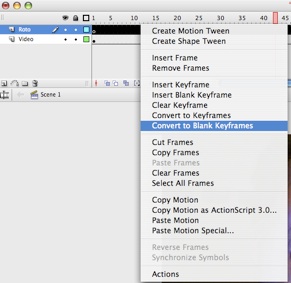
6.Double click on the blank bar in that timeline. Then right click (PC) or ctrl-click (MAC) and choose “Convert to Blank Keyframes”.
-
7.Click on the first frame.
-
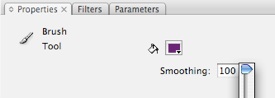
8.Choose the color you want to work with and click on the paintbrush. If you’re outlining, choose a nice thin brush, and (I recommend) pulling the smoothing preference up to 100 (under “Properties”). That gives it a nice calligraphic look.
-
9.Click in the first blank keyframe and paint away! Repeat with more keyframes until bored.
-
10. Create more layers. You can create layers for highlights and shadows if you want to rotoscope them separately. Definitely create a layer for your backgrounds. This should be the bottom most layer, you can keep it beneath your video layer, and when you want to see the animation, simply hide the video layer by clicking on the eye in the timeline (hiding and unhiding layers is a very helpful tool for rotoscopers!)
-
11. Create a layer for the rotoball. The best way to handle the ball is NOT to rotoscope it (when you can avoid it), but create a sphere (using the oval tool) and create a Motion Tween.
-
12. When your ball transforms, you can do a Shape Tween. Shape tweens can be messy if you try to do complex objects in one layer. Try breaking them up into as many layers as necessary.
-
13. Decide on a color scheme and a pattern to animate for your background layers, using motion tweens.
-
14. When you’re finished, delete the video layer.
-
15. Enjoy. Tweak. Get it right!
-
16. Export as a .MOV file.
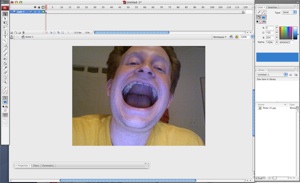
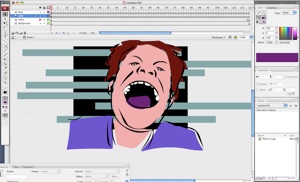
Video is imported to stage, layer (in upper left corner) is renamed “video”.
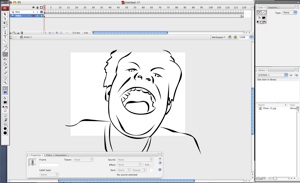
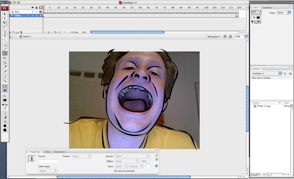
The new layer is renamed “Roto” and converted to blank keyframes. The painting is done with a small brush for outlines.
This is the first image in the sequence with the video layer hidden. Note that only the drawing in the white frame will appear in the final animation.
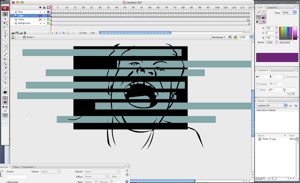
One option is to create another layer just for your color. This layer can be placed beneath the Roto Layer in order to preserve those fancy lines.
The background layer can be put beneath the video layer, and seen when the video is hidden or removed. I kinda like this one better without the color! It would be even more interesting to see those aqua lines tweened.


Using Flash

